Saving, loading and logging
In this section, you will find the information you need to log data with TensorBoard or Weights & Biases and to save and load checkpoints and memories to and from persistent storage.
TensorBoard integration
TensorBoard is used for tracking and visualizing metrics and scalars (coefficients, losses, etc.). The tracking and writing of metrics and scalars is the responsibility of the agents (can be customized independently for each agent using its configuration).
Configuration
Each agent offers the following parameters under the experiment key:
ExperimentCfg(
    directory="",  # experiment's parent directory
    experiment_name="",  # experiment name
    write_interval="auto",  # TensorBoard writing interval (timesteps)
    checkpoint_interval="auto",  # interval for checkpoints (timesteps)
    store_separately=False,  # whether to store checkpoints separately
    wandb=False,  # whether to use Weights & Biases
    wandb_kwargs={},  # Weights & Biases arguments
)
directory: directory path where the data generated by the experiments (a subdirectory) are stored. If no value is set, the
runsfolder (inside the current working directory) will be used (and created if it does not exist).experiment_name: name of the experiment (subdirectory). If no value is set, it will be the current date and time and the agent’s name (e.g.
22-01-09_22-48-49-816281_DDPG).write_interval: interval for writing metrics and values to TensorBoard. A value equal to or less than 0 disables tracking and writing to TensorBoard. If set to
"auto"(default value), the interval will be defined to collect 100 samples throughout training/evaluation (timesteps / 100).
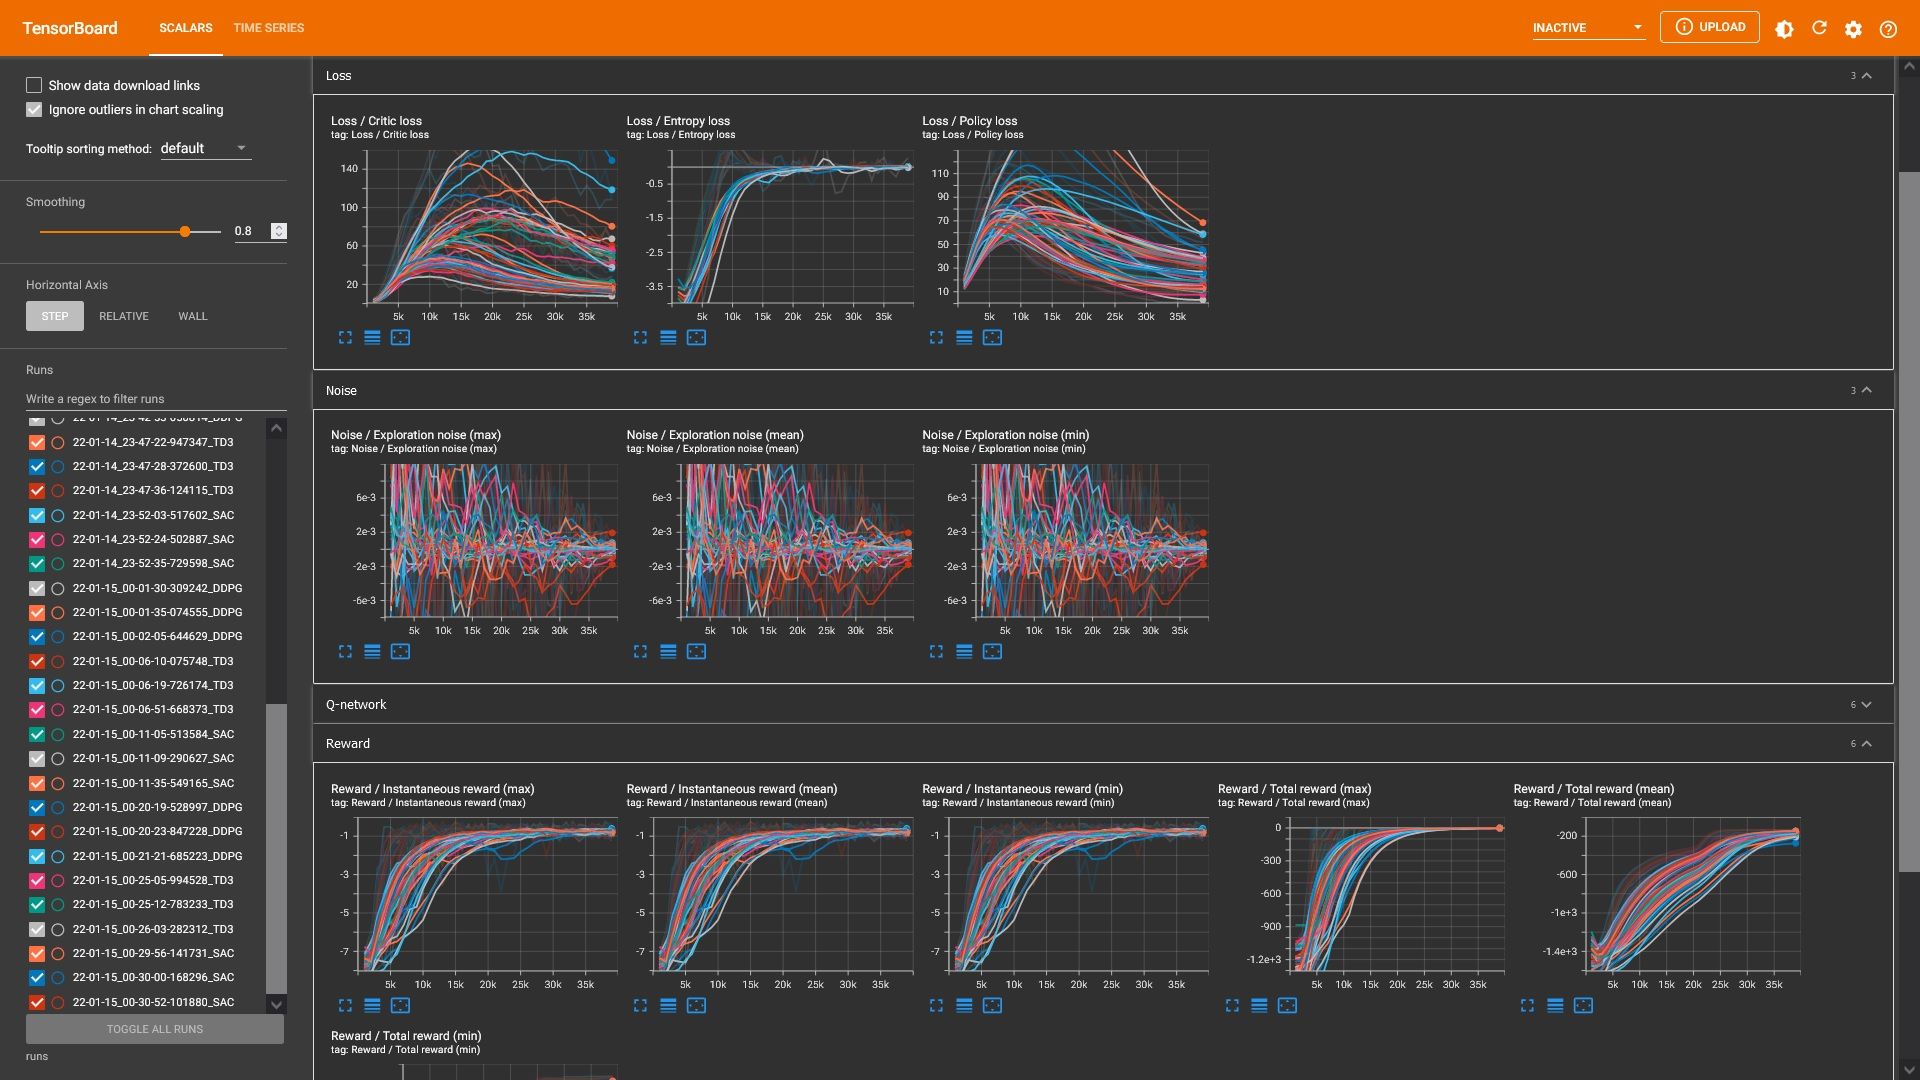
Tracked metrics/scales visualization
To visualize the tracked metrics/scales, during or after the training, TensorBoard can be launched using the following command in a terminal:
tensorboard --logdir=PATH_TO_RUNS_DIRECTORY
Tracking custom metrics/scales
Tracking custom data attached to the agent’s control and timing logic (recommended)
Although the TensorBoard’s writing control and timing logic is controlled by the base class
Agent, it is possible to track custom data. Thetrack_data()method can be used for this purpose by passing the data identification (tag) and the scalar value to be recorded as arguments.For example, to track the current CPU usage, the following code can be used:
# assuming agent is an instance of an Agent subclass
agent.track_data("Resource / CPU usage", psutil.cpu_percent())
Tracking custom data directly to TensorBoard
It is also feasible to access directly to the
SummaryWriterinstance through thewriterproperty if it is desired to write directly to TensorBoard, avoiding the base class’s control and timing logic.For example, to write directly to TensorBoard:
# assuming agent is an instance of an Agent subclass
agent.writer.add_scalar(tag="Resource / CPU usage", value=psutil.cpu_percent(), timestep=1000)
Weights & Biases integration
Weights & Biases (wandb) is also supported for tracking and visualizing metrics and scalars. Its configuration is responsibility of the agents (can be customized independently for each agent using its configuration).
Follow the steps described in Weights & Biases documentation (Set up wandb)
to login to the wandb library on the current machine.
Note
The wandb library is not installed by default. Install it in the Python environment using pip as follows:
pip install wandb
Configuration
Each agent offers the following parameters under the experiment key.
Visit the Weights & Biases documentation for more details about the configuration parameters.
ExperimentCfg(
    directory="",  # experiment's parent directory
    experiment_name="",  # experiment name
    write_interval="auto",  # TensorBoard writing interval (timesteps)
    checkpoint_interval="auto",  # interval for checkpoints (timesteps)
    store_separately=False,  # whether to store checkpoints separately
    wandb=False,  # whether to use Weights & Biases
    wandb_kwargs={},  # Weights & Biases arguments
)
wandb: whether to enable support for Weights & Biases.
wandb_kwargs: keyword argument dictionary used to parameterize the wandb.init function. If no values are provided for the following parameters, the following values will be set for them:
"name": will be set to the name of the experiment directory."sync_tensorboard": will be set toTrue."config": will be updated with the configuration dictionaries of both the agent (and its models) and the trainer. The update will be done even if a value has been set for the parameter.
Checkpoints
Saving checkpoints
The checkpoints are saved in the checkpoints subdirectory of the experiment’s directory
(the path can be customized using the options described in the previous subsection).
The checkpoint name is the key referring to the agent (or models, optimizers and preprocessors) and the current timestep
(e.g. runs/22-01-09_22-48-49-816281_DDPG/checkpoints/agent_2500.pt).
The checkpoint management, as in the previous case, is the responsibility of the agents (can be customized independently for each agent using its configuration).
ExperimentCfg(
    directory="",  # experiment's parent directory
    experiment_name="",  # experiment name
    write_interval="auto",  # TensorBoard writing interval (timesteps)
    checkpoint_interval="auto",  # interval for checkpoints (timesteps)
    store_separately=False,  # whether to store checkpoints separately
    wandb=False,  # whether to use Weights & Biases
    wandb_kwargs={},  # Weights & Biases arguments
)
checkpoint_interval: interval for checkpoints. A value equal to or less than 0 disables the checkpoint creation. If set to
"auto"(default value), the interval will be defined to collect 10 checkpoints throughout training/evaluation (timesteps / 10).store_separately: if set to
True, all the modules that an agent contains (models, optimizers, preprocessors, etc.) will be saved each one in a separate file. By default (False) the modules are grouped in a dictionary and stored in the same file.
Checkpointing the best models
The best models, attending the mean total reward, will be saved in the checkpoints subdirectory of the experiment’s directory.
The checkpoint name is the word best and the key referring to the model
(e.g. runs/22-01-09_22-48-49-816281_DDPG/checkpoints/best_agent.pt).
The best models are updated internally on each TensorBoard writing interval write_interval
and they are saved on each checkpoint interval checkpoint_interval.
The store_separately key specifies whether the best modules are grouped and stored together or separately.
Loading checkpoints
Checkpoints can be loaded (e.g. to resume or continue training) for each of the instantiated agent independently via
the load() (or for each model, via the load() method).
It accepts the path (relative or absolute) of the checkpoint to load as the only argument.
The checkpoint will be dynamically mapped to the device specified as argument in the class constructor.
Note
The agents or models instances must have the same architecture/structure as the one used to save the checkpoint. The current implementation loads the model’s state-dict directly.
Note
Warnings such as [skrl:WARNING] Cannot load the <module> module. The agent doesn't have such an instance
can be ignored without problems during evaluation. The reason for this is that during the evaluation not all components,
such as optimizers or other models apart from the policy, may be defined.
The following code snippets show how to load the checkpoints through the instantiated agent (recommended) or models. See the Examples section for showcases about how to save and load checkpoints and use them to continue the training or evaluate experiments.
# assuming agent is an instance of an Agent subclass
agent.load("./runs/22-09-29_22-48-49-816281_DDPG/checkpoints/agent_1200.pt")
# assuming policy is an instance of a Model subclass
# - policy = StochasticModel(...), or
# - policy = agent.models["policy"] or agent.policy
policy.load("./runs/22-09-29_22-48-49-816281_DDPG/checkpoints/2500_policy.pt")
In addition, it is possible to load, through the library utilities, trained agent checkpoints from the Hugging Face Hub (huggingface.co/skrl). See the Hugging Face integration for more details.
from skrl.utils.huggingface import download_model_from_huggingface

# assuming agent is an instance of an Agent subclass
path = download_model_from_huggingface("skrl/OmniIsaacGymEnvs-Cartpole-PPO", filename="agent.pt")
agent.load(path)
Memory export / import
Exporting memories
Memories can be automatically exported to files at each filling cycle (before data is overwritten). Its activation, the output files’ format and their path can be modified through the constructor parameters when an instance is created.
memory = RandomMemory(
    memory_size=16,
    num_envs=env.num_envs,
    device=device,
    export=True,
    export_format="pt",
    export_directory="./memories",
)
export: enable or disable the memory export (default is disabled).
export_format: the format of the exported memory (default is
"pt"). Supported formats are PyTorch ("pt"), NumPy ("np") and Comma-separated values ("csv").export_directory: the directory where the memory will be exported (default is
"memory").
Importing memories
TODO